The “Getting Started with the QC Traceability” page will get you through the very first basic steps you need to follow right after installing our app.
QC Traceability for Confluence Cloud is a Confluence app available from the Atlassian marketplace.
The process of Traceability is straightforward and consists of setting up your projects, configuring your page traceability, and generating reports.
Installation
The app can be installed from the Atlassian Marketplace and is only available for Confluence Cloud instances.
You can install the app from the Atlassian Marketplace by clicking the “Try it free” button and selecting the Confluence site to which you are going to use it, or you can follow the steps below to install directly through your instance’s UI.
-
Open the “Apps” menu in the left sidebar
-
Select the “Explore more apps” option
-
Search for “QC Traceability”
-
Click “Try it free” to install it on your site.
Usage
With the QC Traceability app, users can enhance project management by providing comprehensive Traceability across all stages of the project lifecycle and ensure compliance with several ISO Standards such as ISO 62304, GAMP5, etc.
Step 1: Set Up Your Projects
To get started, you need to set up your projects using the QC Traceability app. This involves creating items, adding them to collections, and defining project rules.
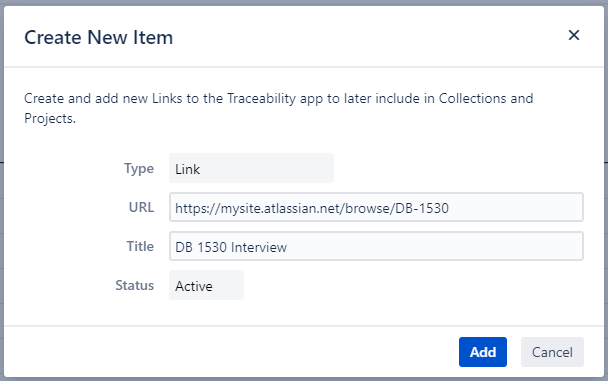
1.1 Create Items
-
Navigate to Apps → QC Traceability → Items tab and click on the “Create” button.
-
Fill in the necessary details for each item, such as title, URL, and any relevant attributes.
-
Save each item once completed.
1.2 Add Items to Collections
-
Navigate to Apps → QC Traceability → Collections tab and click on the “Create” button or select an existing collection.
-
Add the items you created to the collection by selecting them from the list.
-
The collection is automatically saved.

1.3 Define Project Rules
-
Navigate to Apps → QC Traceability → Projects tab and click on the “Create” button to start a new project.
-
Define the rules for your project, including item relationships, dependencies, and traceability requirements.
-
The project is automatically saved.

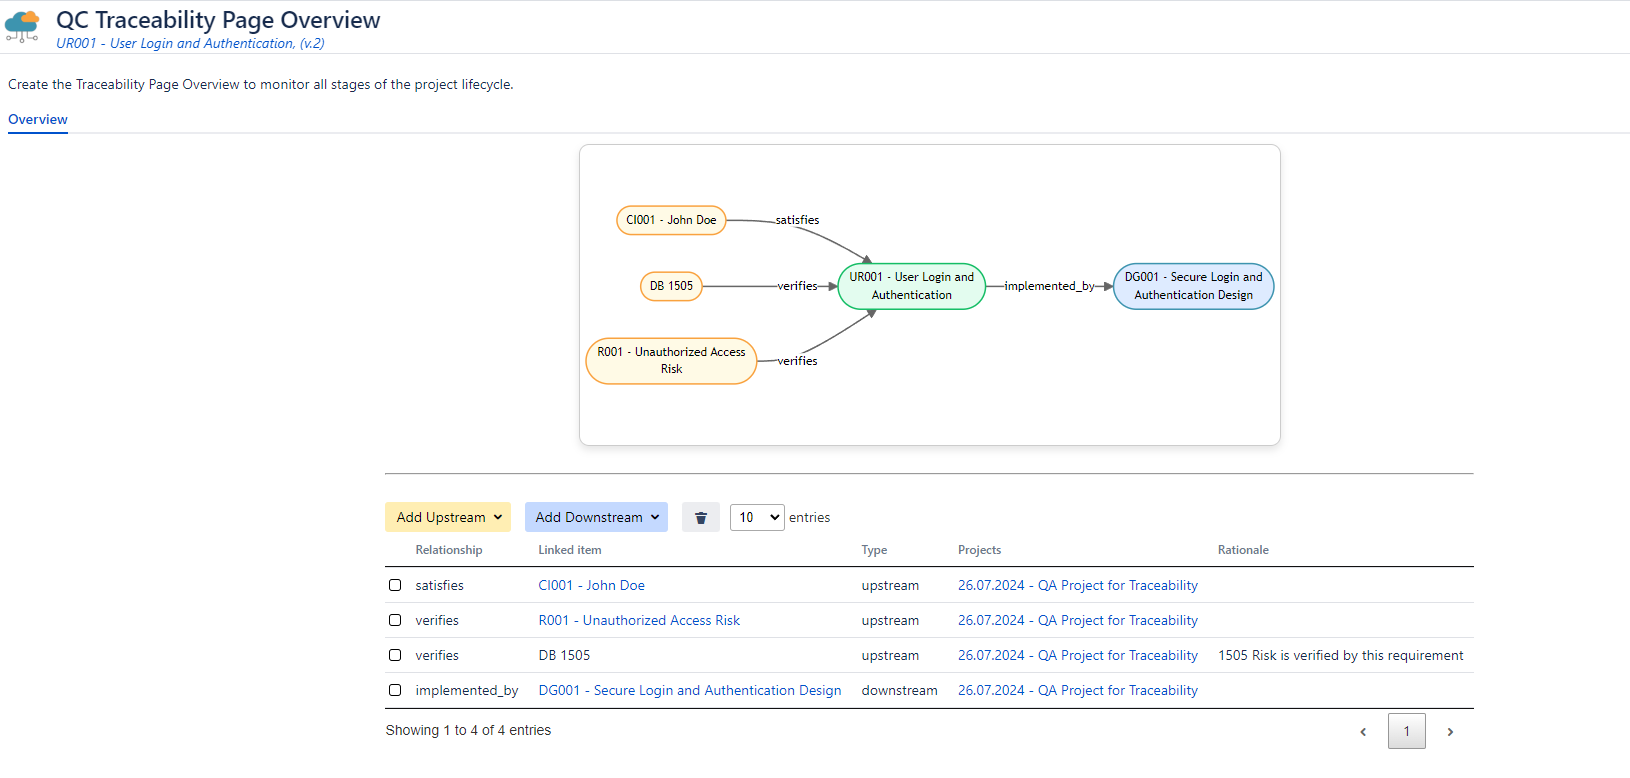
Step 2: Configure the QC Traceability Page Overview
Next, you need to configure the QC Traceability Page Overview to monitor upstream and downstream links.
2.1 Open the QC Traceability Page Overview
-
Navigate to the Confluence page where you want to add the QC Traceability overview.
-
Click on the three dots in the upper right corner and select the QC Traceability Page Overview.
2.2 Add Upstream and Downstream Items
-
In the QC Traceability Page Overview, click on the “Add Upstream” button to specify the upstream links you want to monitor.
-
Save your changes.
-
Now, click on the “Add Downstream” button and specify the downstream links you want to monitor and save your changes.

Step 3: Generate Reports
Finally, you need to generate reports to get insights into your project’s traceability.
3.1 Project Overview Report
-
Choose the project for which you want to generate the report
-
Navigate to the Report tab and from the available “Report Type” options select the one that you want.
-
Export the report to CSV, Excel, or Word.

3.2 Page Overview Report
-
Navigate to the Confluence page for which you want to generate the Traceability report.
-
Click on the three dots in the upper right corner and select the QC Traceability Page Overview.
Tips and Best Practices
-
Consistent Relationship Types: Ensure your relationship types are well-defined and consistent to maintain clear traceability.
-
Regular Updates: Regularly update your items, collections, and projects to keep your traceability accurate and up-to-date.
-
Utilize Reports: Use the report tables to gain insights and identify any gaps or issues in your traceability structure.