
A quite interesting feature of the QC Read & Understood app that will help a lot of people and save them some time from manually adding users to R&U on multiple pages is the Acknowledgements feature.
With the ACK functionality, adding users to review your Confluence pages becomes easier since you can now assign user groups to specific labels.
The first thing you have to do is to create user groups according to your preferences (by the role of people within the company) and add some labels to your pages.
Creating an Acknowledgement
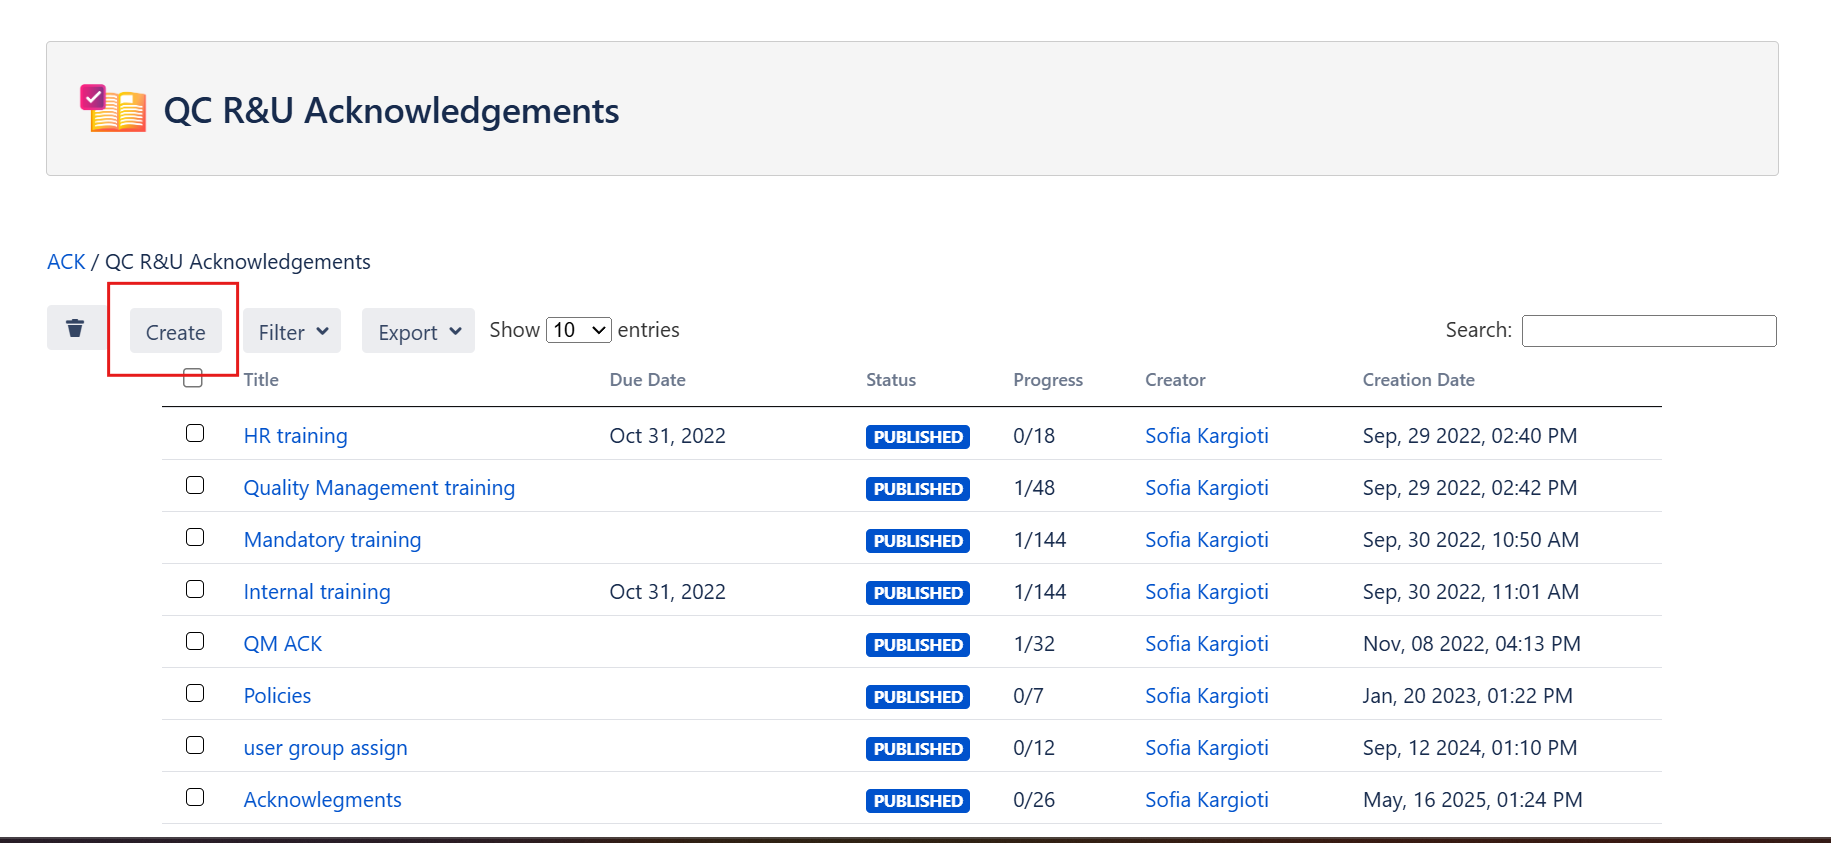
To create an ACK all you have to do is go to Space settings → App links → QC Acknowledgements. This will land you on the Acknowledgements Overview table, and from here, you can now hit the “Create” button to start on your first ACK.
Acknowledgements basic info
Give each of your Acknowledgements a unique title and add some short descriptions for a better understanding of its content.
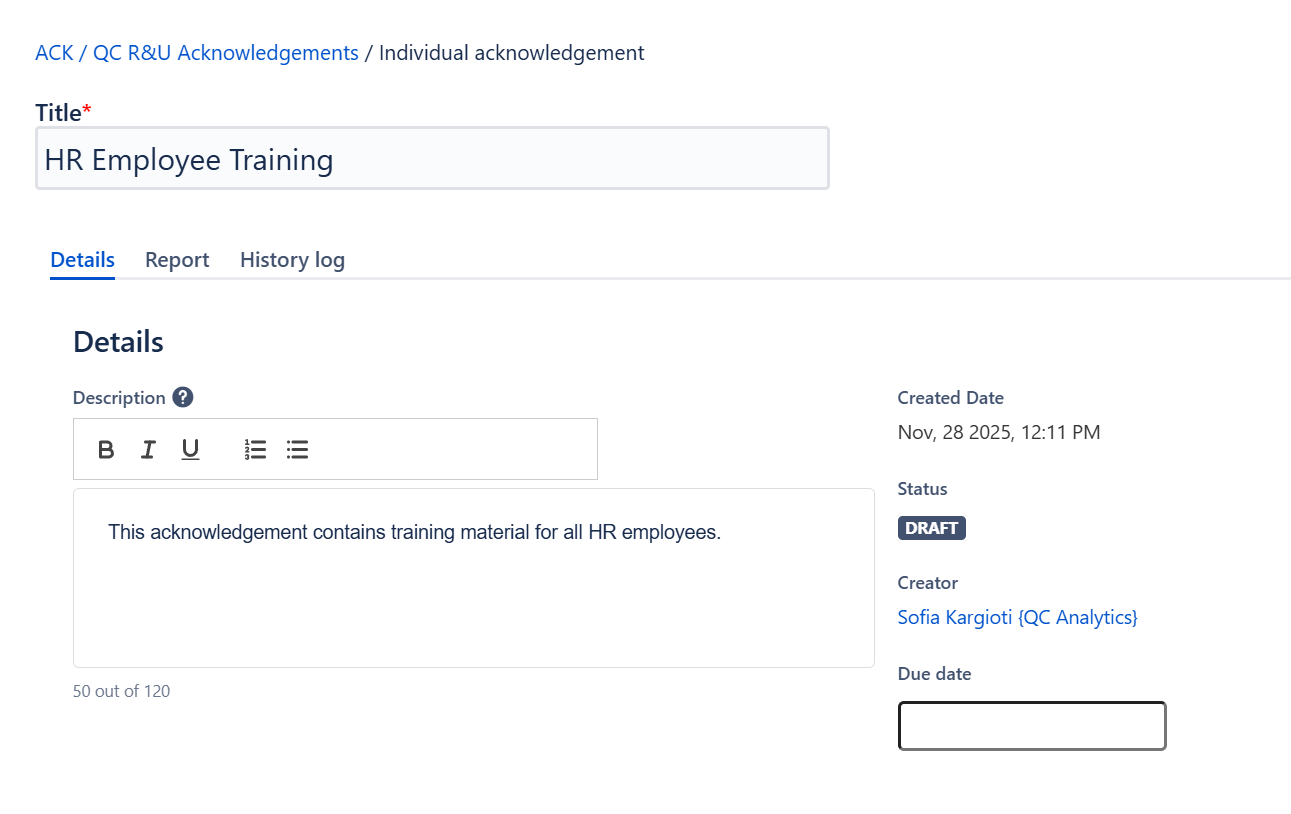
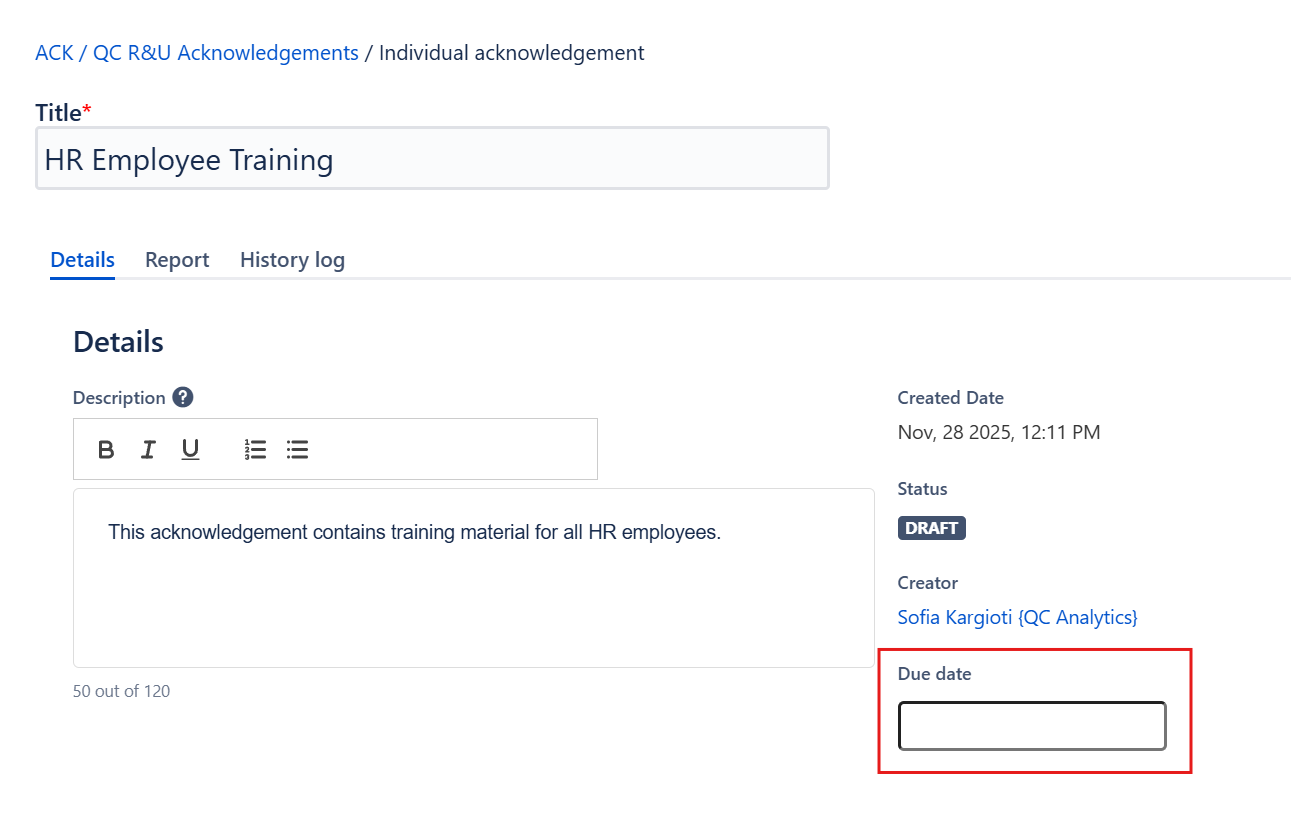
You can also add a Due Date in case you want your employees to finish the R&U before a certain time period.
Adding users
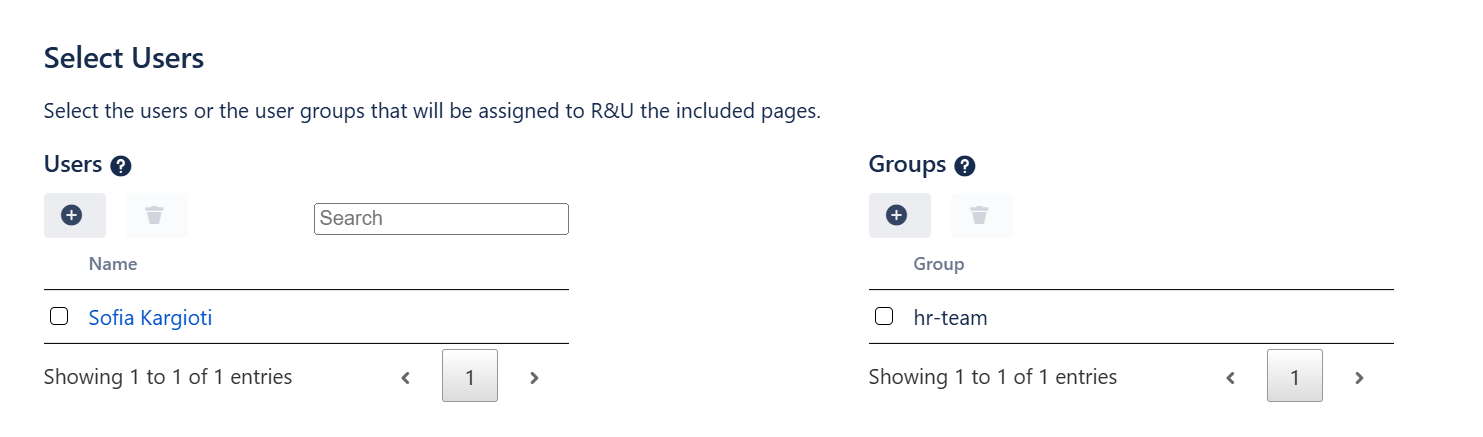
There are two ways you can add users to an Acknowledgement:
-
Users, by typing the name of each employee; and
-
Groups, by typing the name of the desired user group.
Adding pages
You can choose between the three available options to include pages in your acknowledgements:
-
Ancestor page: It includes all the child pages that are under the selected ancestor
-
Pages: Select individual pages to include in the acknowledgement and assign users to R&U
-
Labels: Use labels to select multiple pages at a time. All new pages with the selected label will be automatically added to the Acknowledgement.
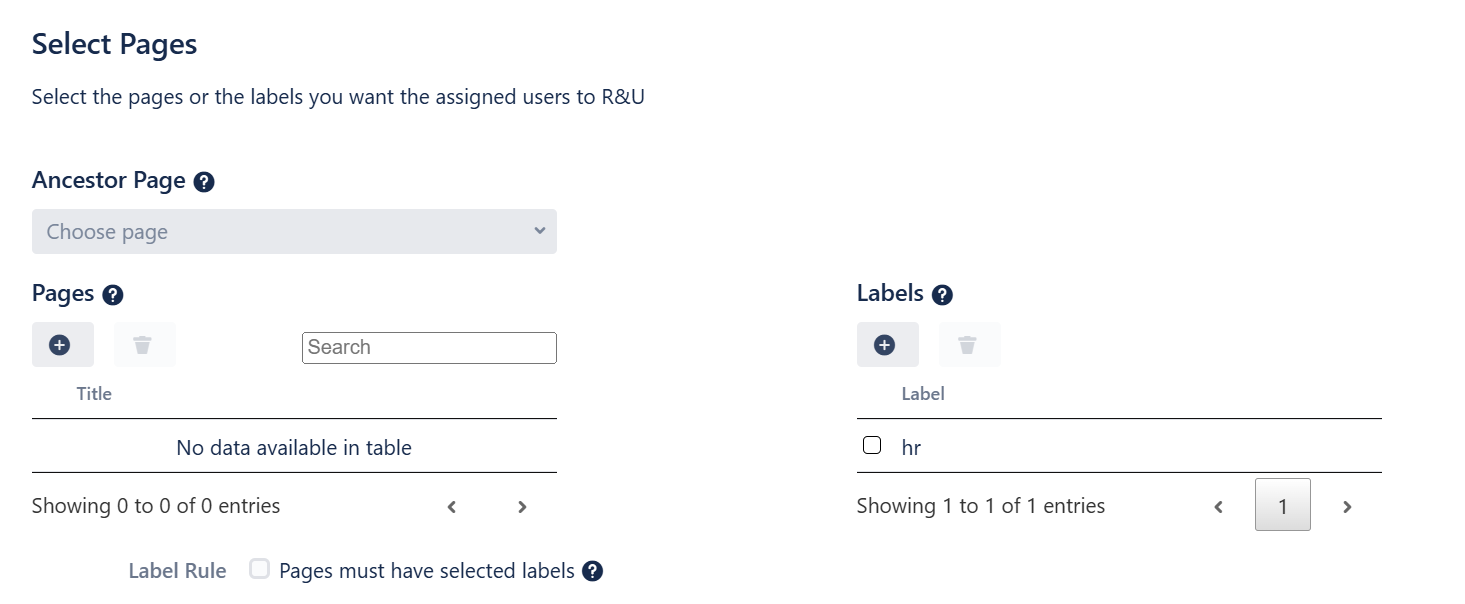
Tip: You can add both “Pages” and “labels” and enable the “Pages must have selected labels” option to include only those pages from the selected one that have the defined label.
Expiration Date
-
When creating or editing an acknowledgment, scroll to the bottom of the page to find the field labeled “R&U Expiration”.
-
Enable expiration and set the frequency:
-
Check the box labeled “R&U confirmations should expire”.
-
Choose when acknowledgments should expire:
-
Daily
-
Weekly on a specific day
-
Monthly on a specific date
-
Yearly on a specific date
-
-
-
Click Update to apply and save the changes.
-
Once the expiration date is reached, the R&U status for all included pages will reset to PENDING, and users will need to reconfirm their acknowledgment.

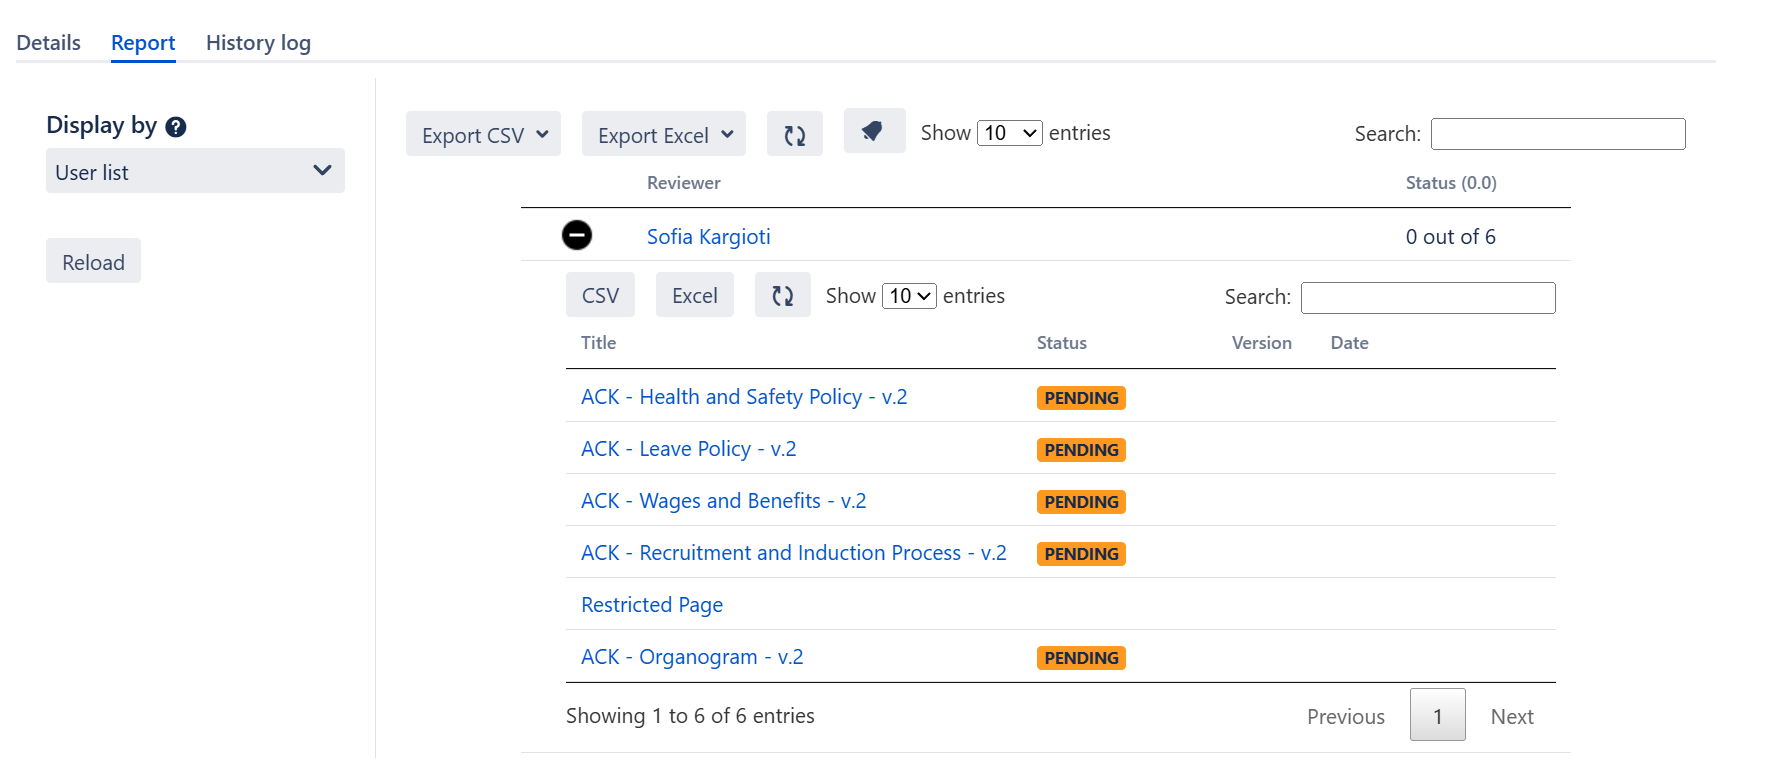
Generating ACK data
There are two ways you can view the pages and the users that were added to an Acknowledgement after publishing it.
-
By accessing the acknowledgement and navigating to the “Report” tab. Here, you can filter the table to display data according to the user or the page list, as well as notify the users about the ACK.
-
By using the QC R&U by Acknowledgement macro. While editing the macro, you can choose the Space and the title of the ACK you want to monitor the progress.
All ACK data are displayed only in the ACK Report table or the QC R&U by Acknowledgement macro.
Editing an Acknowledgement
You can edit an ACK by accessing it through the Acknowledgements Overview table. Changes you can make involve:
-
editing the title
-
editing the description
-
editing the due date
-
adding/removing users
-
adding/removing pages.
Deleting an Acknowledgement
To delete an ACK you no longer want to be displayed in the Acknowledgements Overview table, all you have to do is select the specific acknowledgement and hit the “Delete” button. Please keep in mind that you can only delete DRAFT acknowledgements.