
Documentation for QC Status is a page dedicated to help you learn how to use our macros and many more.
QC Count Status
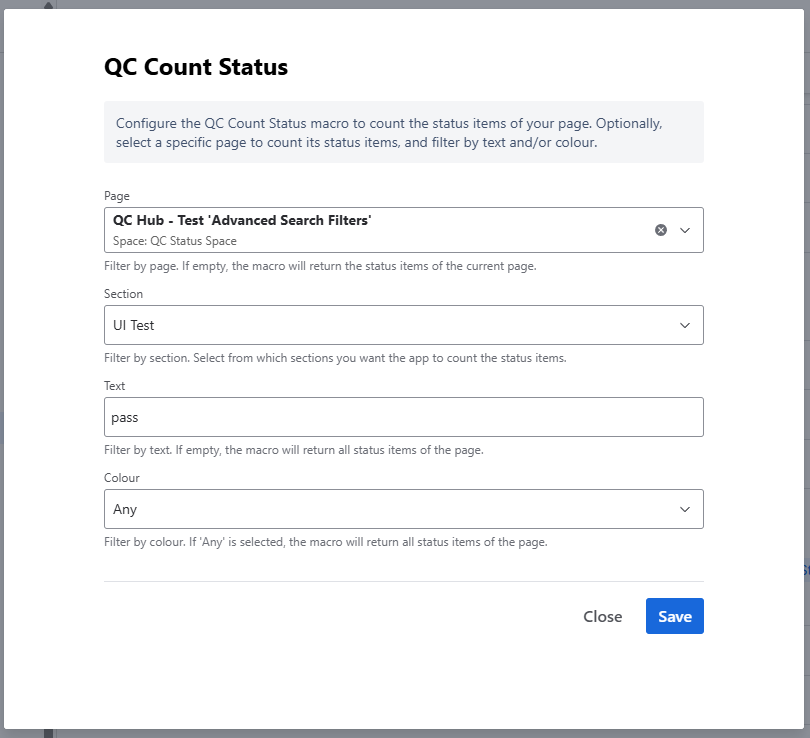
The QC Count Status macro counts the number of status items on a page. You can filter by section, text, or color.
How to use the QC Count Status macro
-
In the “Page” dropdown, start typing the title of the desired page, and once it’s displayed in the options, click on it to select it.
ℹ️This is an optional step, and if you leave this field empty, it will return the number of the status items within the current page. -
Open the “Section” dropdown to configure the exact section of the page where you want the app to count.
ℹ️The app automatically displays all the headers of the page. By default, this option is set to “All” to return the number of statuses within your whole page. -
In the “Text” field, type the status text that can be found on your page.
ℹ️If you leave this field empty, the QC Count Status macro will return the number of all the statuses within your page. -
Specify the colour by selecting it in the “Colour” dropdown.
ℹ️All available options here are the same as the Status macro of Confluence (Blue, Green, Grey, Purple, Red, Yellow). By default, this is set to “Any” which will return the number of all the statuses within your page. -
Click “Save” to save the macro’s configuration and add it to your page.
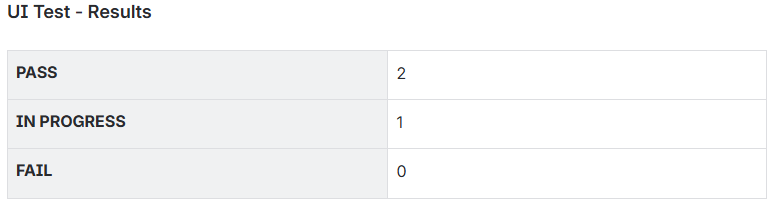
How you choose to display the data of the QC Count Status is up to your liking and convenience. For our example here, we added a table (/table) to a Confluence page, in the left column (acting as the table header), we added the statuses, and in the right column, we added the QC Count Status macro.
QC Status Overview
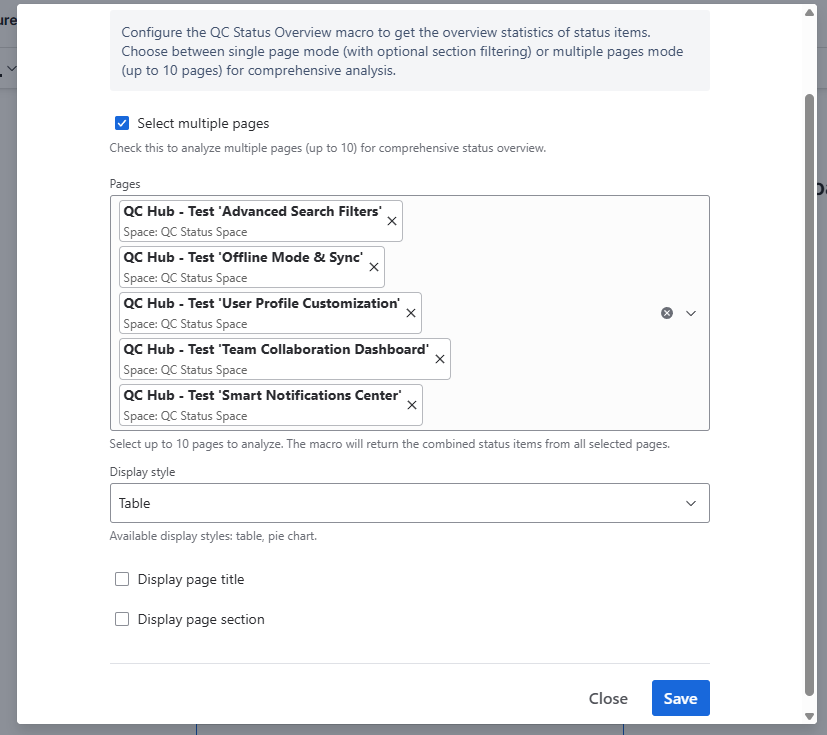
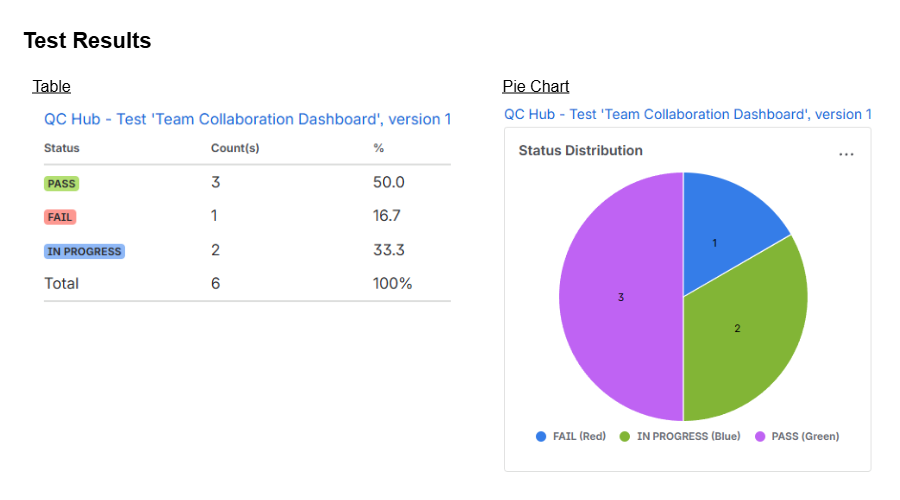
Generates an overview of status statistics in table or chart form, across one or more pages.
How to use the QC Status Overview macro
With the QC Status Overview macro, you can either:
-
Display an overview of the statistics on multiple pages (up to 10), or
-
Display an overview of the statistics on one page.
QC Status Overview for multiple pages
To configure the macro to show the overview of multiple pages, follow these steps:
-
Click the “Select multiple pages” box.
-
In the “Pages” dropdown, start typing the title of each page, and once it’s displayed in the options, click on it to select it.
-
Choose the way you want to display the data in the “Display style” menu. The available styles are:
-
Table,
-
Pie Chart.
-
-
Click “Save” to save the macro’s configuration and add it to your page.

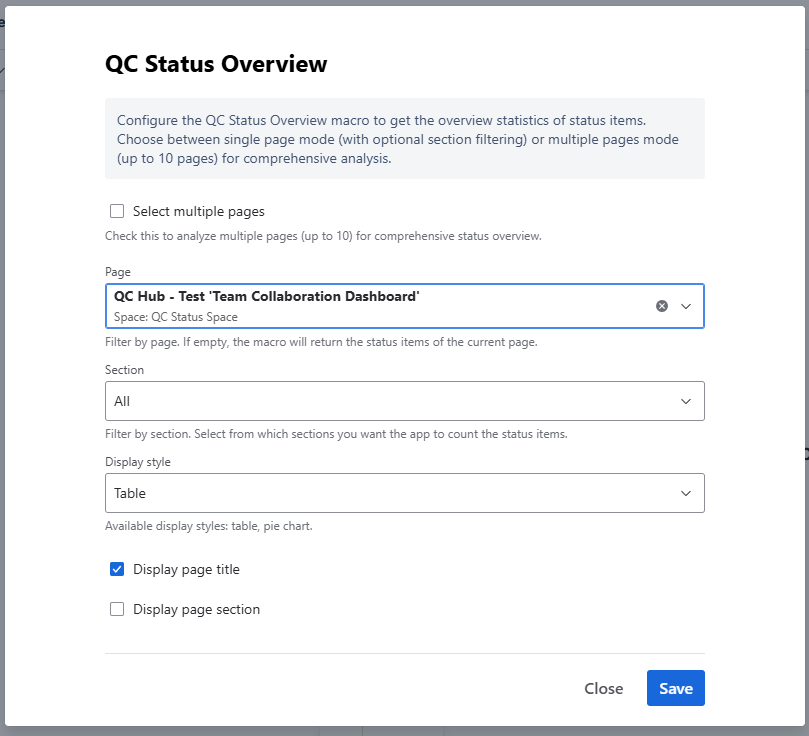
QC Status Overview for a single page
QC Status Overview for a single page
To configure the macro to show the overview of one page, follow these steps:
-
In the “Page” dropdown, start typing the title of the desired page, and once it’s displayed in the options, click on it to select it.
-
Open the “Section” dropdown to configure the exact section of the page from which you want to see the status overview.
ℹ️The app automatically displays all the headers of the page. By default, this option is set to “All”. -
Choose the way you want to display the data in the “Display style” menu. The available styles are:
-
Table,
-
Pie Chart.
-
-
Choose if you want to display the page title and the selected section by enabling the “Display page title” and “Display page section” checkboxes.
-
Click “Save” to save the macro’s configuration and add it to your page.
QC Status Manager
With the QC Status Manager, you can perform bulk changes to your published pages by replacing and deleting status items..
How to replace status items on a published page
To bulk replace statuses, follow these steps:
-
Click on “More actions” (three dots in the upper-right corner of your page)
-
From the “Apps” menu, select “QC Status Manager”
-
In the “Replace” tab, select the section in which you want to apply the changes. To apply the changes to the whole page, select “All Sections”
-
In the “From” field, choose the status you want to replace. The app automatically shows all the status items of your page (or the selected section).
-
In the “To” field, configure the new status that will replace the selected status.
-
Click “Replace”
-
The QC Status app will need to publish a new version of the page with the latest changes. In the dialog that pops up, click “Yes”
-
A new page version was published, and the statuses have now been replaced!
How to delete status items on a published page
To bulk delete statuses, follow these steps:
-
Click on “More actions” (three dots in the upper-right corner of your page)
-
From the “Apps” menu, select “QC Status Manager”
-
In the “Delete” tab, select the section from which you want to delete the statuses. To apply the changes to the whole page, select “All Sections”
-
In the “From” field, choose the status you want to delete. The app automatically shows all the status items of your page (or the selected section).
-
Click “Delete”
-
The QC Status app will need to publish a new version of the page with the latest changes. In the dialog that pops up, click “Yes”
-
A new page version was published, and the statuses have now been deleted!
Deprecated Macros
Due to Atlassian’s recent changes and the app’s migration to Forge, two older macros have been deprecated:
-
QC Count Status of a Page Property Report macro
-
QC Status Overview Stats of a Page Property Report macro
Atlassian will no longer support certain elements that were used to build these two features. As a result, they’re no longer compatible with the updated Forge platform. You can find more about these changes here.